
 +86-0515-86223369
  0
0






Ha segítségre van szüksége, forduljon hozzánk bizalommal
 Products & Solutions
 ELŐTTI

Otthon / Hír / Ipari hírek / Kvarcküvetták tisztítása CD-spektroszkópiához: Teljes laboratóriumi útmutató
Kvarcküvetták tisztítása CD-spektroszkópiához: Teljes laboratóriumi útmutató
A fehérje körkörös dikroizmus spektruma tökéletesnek tűnt tegnap. Ma az alapvonal felfelé görbül 215 nm alatt, a jel-zaj arány összeomlott, és a másodlagos szerkezeti illesztés szerint az alfa-hélix 40 százalékról 25 százalékra csökkent. Semmi sem változott a mintán. A szokásos gyanúsított ül a mintatartóban: egy kvarcküvetta, ami nem tiszta. A kvarcküvetták tisztítása a CD-spektroszkópiához rutin lépés, amelyet a laboratóriumok alábecsülnek, és ez az első hely, ahol figyelni kell, ha váratlanul romlik az adatminőség.
A lényegi következtetést már az elején leszögezhetjük: a látható hullámhosszon tökéletesen tisztának tűnő küvetta 190-230 nm-en is katasztrofálisan piszkos lehet, ahol a legtöbb fehérje-CD-mérés történik. A használható alapvonal és a tönkrement spektrum közötti különbség gyakran túl vékony ahhoz, hogy észrevegye. Ez az útmutató elmagyarázza, hogy a CD-spektroszkópia miért egyedülállóan érzékeny a küvetta állapotára, hogyan lehet azonosítani az egyes szennyeződéstípusokat, melyik tisztítási módszer állítja helyre az optikai felületet, mely hibák okoznak maradandó károsodást, és hogyan ellenőrizhető, hogy a küvetta valóban készen áll-e a mérésre.
Az alábbi protokollok a rutin fehérjebiofizikai munkák során alkalmazott gyakorlati eljárások. Kompatibilisek bármely neves kvarcküvetta-gyártó kvarc- és olvasztott szilícium-küvettáival, és a legkevésbé agresszív napi öblítéstől a mélyebb fertőtlenítési lépésekig rendelhetők, csak akkor, ha a rutin tisztítás nem elegendő.
Legfontosabb következtetés: a tiszta kvarcküvetta a legegyszerűbb és legolcsóbb biztosítás a reprodukálható cirkuláris dikroizmus adatokra. Mindig zárja ki a küvetta szennyeződését, mielőtt hozzáér a műszerhez.
Miért támaszt rendkívüli követelményeket a CD-spektroszkópia a küvetta tisztaságával szemben?
A cirkuláris dikroizmus a bal és a jobb oldali körkörösen polarizált fény abszorpciójának apró különbségét méri. Egy tipikus tíz millifokos CD-sáv nagyjából 3 x 10^-4 AU abszorbancia-különbségnek felel meg, amely tíz-százszor kisebb, mint a rutin UV-Vis spektrumban rögzített abszorpciós sávok. A küvettából származó optikai műtermék tehát nem kis korrekció; ez egy versengő jel, amely meghaladhatja a valós spektrumot. Ez az érzékenység az oka annak, hogy a tiszta küvetták az érvényes CD-adatok előfeltétele, nem pedig a későbbiekben optimalizálandó részlet.
A távoli UV-tartomány további terhet ró az optikai anyagra. 200 nm alatt a víz, az oldott oxigén és még a nagy tisztaságú pufferkomponensek is érezhetően felszívódnak. Az olvasztott szilícium-dioxid ablaknak a már korlátozott fényből a lehető legtöbbet át kell engednie. A piszkos vagy sérült ablak csökkenti a fotonfluxust, nagyobb erősítésre kényszeríti a detektort, és gyorsabban növeli a zajt, mint a legtöbb más spektroszkópiai technikánál. A gyakorlatban a 210 nm alatti távoli UV-CD a legigényesebb küvetta-alkalmazás, amellyel egy laboratórium találkozni fog.
A küvetta állapota négy független mechanizmuson keresztül befolyásolja a CD-adatokat. Először is, egy elnyelő film csökkenti az áteresztett fényt, és megemeli a fotomultiplikátor dinódafeszültségét. Másodszor, a részecskék és a mikrokarcolások szórják a fényt, amelyet a rendszer alapvonal-eltolásként és zajként érzékel. Harmadszor, a kvarc mechanikai igénybevétele vagy maratása kettős törést eredményez, ami a lineárisan polarizált fényt látszólagos elliptikus műtermékké alakítja. Negyedszer, egy érdes vagy lerakódott felület megváltoztatja azt a tényleges úthosszt, amelyet a nyaláb ténylegesen mintát vesz. Mindegyik mechanizmus más-más meghibásodási mintát eredményez a spektrumban, ezért van szükség szisztematikus tisztítási stratégiára.
A küvetta anyagának megválasztása határozza meg, hogy a műszer milyen messzire tud menni a távoli UV-sugárzásba. A JGS1 minőségű szintetikus fuzionált szilícium-dioxid 180 nm alatt átlátszó, és a fehérje távoli UV-CD szabványa. A JGS2 jelzésű természetes olvasztott kvarc körülbelül 200 nm-ig átereszt és elfogadható közel UV-CD-hez és rutin UV-Vis munkához. A JGS3 kvarc infravörös átvitelre van optimalizálva, és nincs helye a CD-küvettában. A boroszilikát üveg nagyjából 320 nm alatt erősen abszorbeál, és CD-re teljesen alkalmatlan.
| Anyagminőség | Praktikus kisebb hullámhossz | Tipikus CD használat |
|---|---|---|
| Szintetikus olvasztott szilícium-dioxid (JGS1) | 170-180 nm | Fehérjék, peptidek és nukleinsavak távoli UV-CD-je 200 nm alatt |
| Olvasztott kvarc (JGS2) | Körülbelül 200 nm | Közeli UV-CD és rutin UV-Vis mérések |
| Infravörös optikai kvarc (JGS3) | Körülbelül 250 nm | UV CD-hez nem ajánlott |
| Boroszilikát üveg | Körülbelül 300-320 nm | Nem használható CD vagy 320 nm alatti UV mérésekhez |
Még a tiszta küvetta is használhatatlan lehet, ha az ablak karcos. A karcolások szórják a fényt, és helyi eltéréseket hoznak létre az úthosszban; a következő tisztítási ciklus során is összegyűjtik a szennyeződéseket, és szinte lehetetlen eltávolítani őket. Éppen ezért a tisztítás elválaszthatatlan a kezeléstől: a gondatlan használat olyan károkat okoz, amelyek miatt még a legjobb protokoll is meghiúsul.
Legfontosabb következtetés: kezdje a megfelelő kvarcminőséggel és egy tiszta, feszültségmentes ablakkal; különben semmilyen adatfeldolgozás nem képes helyreállítani a torz CD-spektrumot.
Gyakori szennyeződések és hogyan torzítják a CD-spektrumokat
Még akkor is, ha a küvettákat kizárólag nagy tisztaságú vízzel és HPLC-minőségű pufferrel használják, felhalmozódnak a szennyező filmek. Maguk a biológiai minták a leggyakoribb források, mivel a fehérjék, peptidek, nukleinsavak és lipidek hajlamosak adszorbeálódni a fuzionált szilícium-dioxid felületeken. A bőrrel való érintkezés, a laboratóriumi légkör és még a csomagolóanyagok is hozzáadják a lerakódásokat. A fólia típusának azonosítása hasznos, mert minden szennyezettségi osztály más-más tisztítási kémiára reagál.
| Szennyezőanyag | Tipikus forrás | Látható jel | Tipikus hatás a CD-spektrumra |
|---|---|---|---|
| Protein film | Száradásra hagyott fehérjeminták; adszorpció mérés közben | Általában láthatatlan | 230 nm alá lejtős alapvonal és növekvő abszorpció; hamis negatív sávok 218 nm közelében |
| Lipid vagy hidrofób film | Liposzómák, szérum, lágyító kimosódások | Vízgyöngyök az ablakon | Szórás- és alapzaj; egyenetlen meniszkusz |
| Puffer sókristályok | Cseppek vagy magas sótartalmú minták elpárologtatása | Fehér kristályos foltok az arcokon | Erős szélessávú abszorpció és szórás; szaggatott alapvonal |
| Ujjlenyomatok | Kezelés kesztyű nélkül | Halvány folt, gyakran észrevétlen | Intenzív abszorpció 250 nm alatt; alapvonal-eltolás és látszólagos ellipticitás |
| Por és szálak | Levegő, törlőkendők, kinyitott küvettadobozok | Látható részecskék az ablakon | Rayleigh-szórás, zajcsúcsok, csökkentett használható jel |
| Oldószer maradék | Hiányos öblítés oldószeres mosás után | Egyik sem | Hullámhossz-függő abszorpciós sávok, az oldószertől függően |
Annak megértéséhez, hogy miért számít a takarítási fegyelem, gondolja át, hogy valójában mit csinál egy vékony szennyező film a CD-releváns hullámhosszon. Az alábbi oszlopok reprezentatív látszólagos abszorbancia értékeket mutatnak, amelyeket 220 nm-en adnak hozzá a kvarcküvettán hagyott különböző szennyezőanyagok. Ez a hullámhossz a távoli UV-tartományon belül van, ahol a peptid kromofor a legerősebb CD-jeleit állítja elő. Az értékek szemléltető jellegűek, és a módszerfejlesztő laboratóriumok megfigyelésein alapulnak. Olvassa el ezeket gyakorlati rangsorként: minél nagyobb a hozzáadott abszorbancia, annál agresszívebben kell kizárni a szennyeződést a tisztítás során.
Szennyező filmek által hozzáadott látszólagos abszorbancia 220 nm-en
Reprezentatív értékek 10 mm-es fényútvonalú kvarcküvettához
Ujjlenyomat maradvány 0,12 AU
Adszorbeált fehérjefilm 0,09 AU
Kristályos sólerakódás 0,06 AU
Finom por felhalmozódása 0,035 AU
Szerves oldószer maradék 0,02 AU
Egy tiszta referenciaküvetta 220 nm-en 0,005 AU alatt van.
Az ujjlenyomatok a leggyakoribb szennyeződések, ami sok felhasználó számára meglepő. A bőrváladék aminosavakat, karbamidot és zsírsavakat tartalmaz, amelyek 250 nm alatt erősen abszorbeálódnak. Az optikai felület egyetlen véletlen megérintése több mint 0,1 AU-t adhat hozzá 220 nm-en. A fehérjefilmek a második helyet foglalják el, és ők a legálomosabbak, mivel az egyrétegű réteg a szem számára láthatatlan. Még az egyrétegű fehérjefilm is ferde alapvonalat hoz létre az amid régióban. A lejtőt gyakran összetévesztik a műszereltolódással vagy a puffer eltéréssel. A sókristályok és a por elsősorban szóróközpontként, nem pedig elnyelőként működnek. A szóródás zajt és függőleges eltolást hoz létre, amely nem távolítható el egyszerű üres kivonással. Az oldószermaradék a legkönnyebben orvosolható probléma, de jelenléte általában azt jelzi, hogy az öblítési lépést elsiették. A diagramon szereplő abszolút értékek reprezentatívak, nem univerzálisak; a filmvastagságtól, a pontos hullámhossztól és a küvetta úthosszától függenek. Ami számít, az a nagyságrend: a 0,05-0,1 AU tartományba eső szennyeződések elválasztják a lapos CD alapvonalat a használható tartományon kívülre esőtől. A praktikus elve az, hogy a vizuálisan tökéletes küvetta még mindig piszkos lehet a távoli UV-sugárzásban, így az ellenőrzés soha nem kötelező.
Az összehasonlító beton elkészítéséhez egy jól karbantartott, vízzel töltött kvarcküvettának 220 nm-en 0,01 AU alatti alapvonal-eltolást kell mutatnia. Ha az eltolás meghaladja a 0,05 AU-t, a CD-spektrum emelkedett, zajos alapvonalat mutat 220 nm alatt, és a másodlagos szerkezet dekonvolúciója megbízhatatlanná válik. A referenciafehérje spektrumok adatbázisai azt feltételezik, hogy a küvetta hozzájárulása elhanyagolható; e feltételek megismétlése ugyanazt a tisztítási fegyelmet követeli meg, mint a referencialaboratóriumok.
Legfontosabb következtetés: Az ujjlenyomatok és az adszorbeált fehérjefilmek az elsődleges ellenségek a CD-munkában, és mindkettő eltávolítható enyhe mosószerrel, majd metanolos öblítéssel és nitrogénszárítással.
Kvarcküvetták tisztítása CD-spektroszkópiához: A szabványos napi protokoll
A napi protokoll egy célt szolgál: a minta eltávolítását, mielőtt az véglegesen adszorbeálódna. A CD-ben használt küvettáknál a tisztítás a mérési munkafolyamat része, nem pedig alkalmi munka. A minden mérés után megfelelően kiöblített küvetta ritkán igényel agresszív mélytisztítást. A teljes sorozat körülbelül öt percig tart, és csak olyan reagenseket használ, amelyek biztonságosak az olvasztott szilícium-dioxid számára.
- A mérés után azonnal vegye ki a mintát pipettával. Ne öntse ki; cseppeket öntve az optikai út fölé, amelyek kiszáradnak és beszennyezik a felső falakat.
- Öblítse át a sejtet kétszer vagy háromszor ugyanazzal a pufferrel vagy 10-30 µL friss pufferrel, majd dobja ki. Ez a lépés eltávolítja a fehérjeoldat nagy részét, miközben az még teljesen oldódik.
- Öblítse le legalább tízszer ultratiszta vízzel (18 MΩ·cm). A cél nem egyetlen mosás, hanem a puffer és sói teljes kiszorítása.
- Ha a minta fehérjét, lipidet vagy biológiai mátrixot tartalmaz, töltse meg a küvettát semleges kvarckompatibilis laboratóriumi mosószer 1-2 százalékos oldatával, és hagyja állni 5-10 percig.
- Öblítse le újra tíz-tizenöt térfogatnyi ultratiszta vízzel, hogy eltávolítsa a mosószer minden nyomát. A maradék felületaktív anyag 220 nm-en erősen abszorbeál, és olyan alapvonalat hoz létre, amely pontosan úgy néz ki, mint a fehérjeszennyeződés.
- Öblítse le két vagy három térfogatnyi optikai minőségű metanollal vagy etanollal. Az alkohol kiszorítja a vizet, feloldja a hidrofób maradékokat, és nagymértékben lerövidíti a szárítási lépést.
- Szárítsa meg a küvettát finom szűrt nitrogénsugárral, tiszta, száraz levegővel vagy argonnal. Ne törölje le az optikai felületeket; a száraz felület törlése a mikrokarcok gyakori forrása.
- Fedje le a küvettát a kupakkal, vagy tárolja tiszta, pormentes tokban. Az a küvetta, amely nyitva marad a pad levegőjére, perceken belül összegyűjti a port.
Számos gyakorlati szempont különbséget tesz a tökéletes alapvonal és a marginális között. A küvettát mindig pipettával ürítse ki öntés helyett. Használjon bőséges mennyiséget: a 10-es öblítés a küvetta belső térfogatának tízszeresét jelenti, nem tíz cseppet. A metanollal vagy etanollal végzett végső öblítés erősen ajánlott CD-s munkákhoz, mert a metanol gyorsan elpárolog, és megakadályozza a vízfoltok kialakulását. Egy jól ismert CD-protokoll például előírja a vízzel és metanollal történő öblítést küvettatisztító berendezéssel, valamint a nitrogénnel történő szárítást; ez az egyszerű képlet a rutinmunka mércéje marad.
| lépés | Megoldás | Kapcsolattartási idő | Miért számít |
|---|---|---|---|
| Vegye ki a tömeges mintát | Mintapuffer | Néhány másodperc | Megakadályozza a fehérje adszorpcióját a száradó meniszkuszból |
| Víz öblítés | Ultratiszta víz | 10-15 kötet | Eltávolítja a sókat és a legtöbb lazán megkötött anyagot |
| Mosószeres mosás | 1-2% semleges kvarckompatibilis felületaktív anyag | 5-10 perc | Oldja a fehérje- és lipidfilmeket |
| Mosószer-eltávolító öblítés | Ultratiszta víz | 10-15 kötet | A maradék mosószer 220 nm alatt szívódik fel, ezért az öblítésnek bőségesnek kell lennie |
| Oldószeres öblítés | Optikai minőségű metanol vagy etanol | 2-3 kötet | Kiszorítja a vizet, oldja a szerves maradványokat, gyorsítja a száradást |
| Szárítás | Szűrt nitrogén vagy tiszta száraz levegő | Amíg teljesen megszárad | Megakadályozza a vízfoltok és ásványi anyagok lerakódását |
A küvetta felépítése is befolyásolja a napi protokoll megbízhatóságát. A teljesen összeolvadt egyrészes cellában nincsenek olyan cementált varratok, amelyek felfoghatják az oldószert vagy leválhatnak az ismételt tisztítás után. Az ilyen típusú kvarcküvetták szükség esetén ultrahanggal kezelhetők, míg a kétrészes cementezett cellákat kíméletesebben kell kezelni. Amikor új küvettát választ ki CD-műveletekhez, érdemes ellenőrizni, hogy az optikai felületek polírozott olvasztott szilícium-dioxiddal készültek-e, és a geometria teljesen összeolvadt-e.
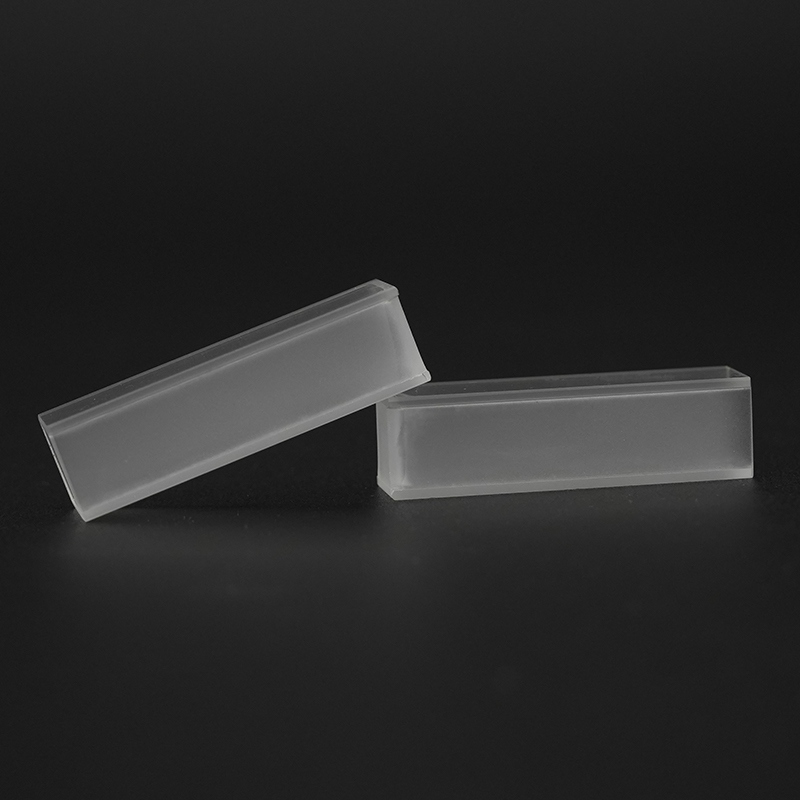 Olvasztott szilika kvarc küvetta UV-Vis és fluoreszcenciához Ez a teljesen olvadt kvarcküvetta 170 és 2700 nm közötti abszorbanciára és fluoreszcenciára alkalmas. Polírozott optikai felülete és robusztus felépítése támogatja a mélytisztítást és a megbízható napi ellenőrzést. Termék megtekintése →
 Legfontosabb következtetés: az ötperces napi öblítési sorozat a CD alapproblémák több mint 90 százalékát megelőzi, és minden mérési alkalom megtárgyalhatatlan részeként kezelendő.
Mélytisztítás makacs filmrétegek és csapadék esetén
Ha egy küvetta ellenőrzése a napi protokoll után sikertelen, a mélyebb tisztítás indokolt. A kulcsfontosságú elv az, hogy olyan reagenst válasszunk, amely megtámadja a lerakódást anélkül, hogy megtámadná a kvarcot. Az olvasztott szilícium-dioxid kémiailag tartós, de nem elpusztíthatatlan: hidrogén-fluoridban oldódik, és lassan bemaródik forró tömény lúgban. Minden alábbi mélytisztító recept tiszteletben tartja ezeket a határokat.
A fehérjefilmeket emésztéssel lehet a legjobban eltávolítani, nem pedig erőszakos kémiával. A standard megközelítés egy 1-2 mg/ml koncentrációjú pepszin oldat 0,1 M sósavban, 37 Celsius-fokon 1-2 órán át inkubálva. Az enzim az adszorbeált fehérjét apró peptidekre bontja, amelyek könnyen leöblíthetők. Az inkubálás után alaposan öblítse ki a küvettát ultratiszta vízzel, majd metanollal, majd szárítsa meg nitrogénnel. Egy másik hatékony lehetőség a 0,5-1 százalékos nátrium-dodecil-szulfát-oldat, amelyet 40-50 Celsius-fokra melegítenek, ami oldja a fehérjéket és a lipideket; még alaposabban le kell öblíteni, mert maga az SDS elnyeli a távoli UV-t.
A sólerakódás és az ásványi lerakódások reagálnak a híg savra. Az 1–2 M-os salétromsav a szokásos választás, mert feloldja a legtöbb szervetlen maradványt, és öblítés után nem hagy maga után semmit. Áztassa 15-30 percig szobahőmérsékleten. Ne kombinálja a savas tisztítást ultrahanggal, mert a vibráció megtámadja a szabad talajszéleket, és felgyorsítja a reakciót. Az általános szerves filmeket oldószerszekvenciával távolítjuk el: metanol, majd aceton, majd etanol, majd víz. Ez a szekvencia vízzel elegyedő oldószerrel kezdődik, feloldja a hidrofób filmeket, és egy olyan oldószerrel fejeződik be, amely vízzel keveredik, így nem történik kicsapási lépés. Az utolsó vizes öblítés eltávolítja a szerves oldószerek minden nyomát. Az aceton önmagában nem ideális első lépésként egy nedves, sóval szennyezett küvettában, mert az aceton kicsapja a sókat és rögzítheti a fehérjéket a felületen.
A leszerelhető küvetták más technikát igényelnek. Az ablakokat külön kell elválasztani, egyenként meg kell tisztítani egy sima PTFE felületen vagy tiszta helyiségben, oldószerrel megnedvesített, szöszmentes kendővel, és tiszta levegőáramban szárítani kell. A fémház tisztítás utáni túlhúzása gyakori hiba; torzítja az ablakokat és kettős törési törést hoz létre, amit egy CD mérés nem tud elviselni. Ujj-szorosan és egy kis fordulat töredékével szerelje össze újra, és ellenőrizze az út hosszát referenciaoldattal.
| letét | Javasolt eljárás | Kapcsolattartási idő | Soha ne használja |
|---|---|---|---|
| Adszorbeált fehérjefilm | Pepszin 1-2 mg/ml 0,1 M HCl-ben 37 Celsius fokon | 1-2 óra | Forró tömény lúg |
| Só és ásványi vízkő | 1-2 M salétromsav szobahőmérsékleten | 15-30 perc | Hidrofluorsav vagy bármilyen fluoridos tisztítószer |
| Lipid film | 1-2% semleges felületaktív anyag 40 Celsius fokon | 10-15 perc | Csiszoló párnák vagy porok |
| Általános szerves lelőhely | Metanol, majd aceton, majd etanol, majd víz | 2-3 kötet of each | Száraz törlés papírtörlővel |
| Ismeretlen vagy vegyes lerakódás | 10% salétromsav, majd 1-2% felületaktív anyag | 30 perc mindegyik | Önmelegedő keverékek, például forró piranha oldat |
Az ultrahangos tisztítás minden fenti eljárást felgyorsíthat, de csak a teljesen összeolvadt egyrészes küvetták esetében. Ha a küvettának cementezett ablaka van, a csatlakozás szivároghat vagy meghibásodhat ultrahangos vibráció hatására. Ha kétségei vannak, ellenőrizze a szállító dokumentációját, mielőtt a küvettát ultrahangos fürdőbe helyezi. A terjedelmes, vastag falú kvarcból készült küvetta elviseli az 5-10 perces szabványos laboratóriumi szonikációs ciklusokat, de a vékonyfalú fluoreszcens sejtek törékenyebbek.
Legfontosabb következtetés: A mélytisztítás olyan mentési művelet, amely csak akkor biztonságos, ha a reagens megtámadja a lerakódást, de a szilícium-dioxid hálózatot nem; ha kétségei vannak, válassza az enyhébb állapotot.
Amit el kell kerülni: A kvarcküvettákat károsító tisztítási hibák
A legtöbb maradandó küvettakárosodást nem a minták, hanem a tisztítási hibák okozzák. Maga az anyag kémiailag stabil, de a vékony polírozott ablakok érzékenyek a reagensekre, csiszolóanyagokra és a hanyag kezelésre. A meghibásodási módok megértése megvédi a küvettát és a CD-adatokat is. Az alábbi táblázat összefoglalja a leggyakoribb hibákat és azok következményeit.
| Hiba | Azonnali hatás | Hosszú távú károsodás |
|---|---|---|
| Tisztítás fluorsavval vagy fluoridos termékekkel | Az ablak perceken belül beborul | A szilícium-dioxid feloldódik; a cellát le kell selejtezni |
| Forró tömény NaOH vagy KOH | A felület fagyosodni kezd | Állandó maratás és erős fényszórás |
| Súrolókorongok, csiszolóporok vagy fémeszközök | Mikrokarcok jelennek meg az arcokon | Szórvány és látszólagos CD-műtermékek, amelyek valódi sávokat utánoznak |
| Száraz törlés papírtörlővel | Látható homályosodás és szösz | A polírozott kvarc visszafordíthatatlan karcolódása |
| Ultrahangos fürdő cementált sejtekhez | Az illesztés szivároghat vagy megszakadhat | A cella elveszíti az úthossz kalibrálását |
| Szerves oldószer a vizes sók eltávolítása előtt | Sókristályok válnak ki | Törléskor a kristályok megkarcolhatják a cellát |
| A minta éjszakán át a cellában maradt | Kemény fehérje- és sófilm képződik | Agresszív tisztítást igényel, amely önmagában károsíthatja a felületet |
| Öblítés csapvízzel | Fémionok rakódnak le a szilícium-dioxidon | UV-elnyelés és extra alapvonal-eltolás |
| Összeszerelt cellák ismételt autoklávozása | A stressz fokozatos felhalmozódása | Törzs kettős törés és torz CD alapvonal |
A piranha oldatot, tömény kénsav és hidrogén-peroxid keverékét néha használják a mikroelektronikai tisztításban. Optikai küvettákhoz általában nem ajánlott. A reakció exoterm, és ha a hőmérséklet emelkedik, kvarc maródhat vagy felhővé válik; komoly laboratóriumi biztonsági kockázatot is jelent. Ha a lerakódás ellenáll a salétromsavnak és a mosószernek, a küvetta gazdaságosabb cseréje, mint a piranhafürdőben való kockázat.
Legfontosabb következtetés: a küvetták gondozásának aranyszabálya egyszerű: soha ne tegyél olyat a küvettával, amit nem tennél egy mikroszkóp objektívvel.
Hogyan ellenőrizhető, hogy a küvetta valóban tiszta-e a CD mérése előtt
Az ellenőrzés az a lépés, amelyet a legtöbb laboratórium kihagy, és ez az a lépés, amely az adatgyűjtés előtt észleli a problémákat. A vizuális ellenőrzés önmagában nem elegendő, mert a legtöbb CD-releváns film egyrétegű. A következő sorrend az egyszerű ellenőrzéstől a műszeralapú tesztek felé halad.
- Szemrevételezés: tartsa a tiszta üres küvettát ferdén világos háttér előtt, és nézze meg, hogy az optikai felületeken vannak-e csíkok, kristályok, szálak vagy homályosság.
- Vízfilm teszt: töltse fel ultratiszta vízzel és ürítse ki; a tiszta olvasztott szilícium-dioxid felület teljesen nedves marad, míg a hidrofób film vízgyöngyöket okoz.
- UV-transzmissziós szkennelés: töltse fel ultratiszta vízzel és szkennelje le 190-400 nm-ig levegővel szemben; a látszólagos abszorbanciának 220 nm-en 0,05 AU alatt, a 280 nm-en mért értéknek pedig 0,01 AU alatt kell lennie.
- CD alapvonal teszt: helyezze a vízzel töltött küvettát a műszerbe, és rögzítse az alapvonalat a munkatartományon belül; az alapvonalnak kb. plusz-mínusz 0,5 mdeg-on belül laposnak kell lennie, és a dinód feszültségének a műszermodell normál értékein kell maradnia.
- Replicate overlay: gyűjtsön össze három egymást követő beolvasást ugyanarról a mintáról; a zajszinten belül kell fedniük, és minden lépésváltozás vagy sodródás mozgó filmet vagy buborékot jelez.
- Referencia szabvány ellenőrzése: új cellák esetén vagy a leszerelhető cellák összeszerelése után ellenőrizze hitelesített referenciával, például kámfor-szulfonsavval, és győződjön meg arról, hogy a 290,5 nm közelében lévő sáv megfelel az úthossz várható értékének.
A küvetta még megmenthető
| A küvettát ki kell cserélni
|
A fenti küszöbértékek a fehérje-CD-laboratóriumokban használt gyakorlati alapértékek. A mind a hat ellenőrzésen áteső küvetta nem lesz korlátozó tényező a mérésben. Ha az ellenőrzés sikertelen, ismételje meg egyszer a mélytisztítást; ha ismét meghibásodik, cserélje ki a cellát, ahelyett, hogy több órát töltene egy elveszett ügyre.
Legfontosabb következtetés: A küvettánkénti kétperces ellenőrzés megóvja a többórás mérési időt, és megakadályozza a teljes adatkészletek kárba veszését.
A megfelelő kvarcküvetta kiválasztása a tisztítási terhelés és az optikai műtermékek csökkentése érdekében
A legjobb tisztítási protokoll a vásárlási döntésnél kezdődik. A CD-hez megfelelően meghatározott küvetta gyorsabban tisztít, könnyebben ellenőriz, és élettartama során jobban reprodukálható alapvonalakat hoz létre. Három döntés dominál: az anyagminőség, a cellaszerkezet és az úthossz.
Az anyagminőség határozza meg a legrövidebb használható hullámhosszt. 210 nm alatti távoli UV-CD esetén adjon meg JGS1 szintetikus olvasztott szilícium-dioxidot, dokumentált átvitellel a 170-220 nm tartományban. A JGS2 olvasztott kvarc 210 nm feletti mérésekhez elfogadható. Az osztályzatot fel kell tüntetni a szállítói igazoláson; ha nem, akkor a küvetta valószínűleg nem CD-hez készült. A konstrukció határozza meg a tisztítási kompatibilitást. A teljesen összeolvadt egyrészes cellák nem tartalmaznak szerves ragasztót, és a fent felsorolt tisztítószerek bármelyikébe áztathatók, beleértve a rövid ultrahangos kezelést is. A cementált cellák olcsóbbak, de nem alkalmasak agresszív tisztításra. A leszerelhető cellák biztosítják a legjobb hozzáférést az ablakokhoz a mélytisztításhoz, és a standard választás nagyon rövid úthosszak esetén. Az alábbi kártyák összefoglalják a szabványos elérési utakat és azok ajánlott CD-alkalmazásait.
0,1 mm-es út
Koncentrált fehérjemintákhoz és mérésekhez használható 185 nm-ig. A minta térfogata körülbelül 10-20 µL. Gyakran leszerelhető cellaként szállítják a buborékok becsapódásának elkerülése érdekében.
0,5 mm-es út
Jó kompromisszum a 185 és 220 nm közötti távoli UV-CD-hez. 50-100 µL térfogata. 5-20 mg/ml-es fehérjeoldatokhoz ajánlott.
1 mm-es út
A leggyakoribb CD-úthossz. 100-200 µL térfogata. Alkalmas távoli UV és közel UV mérésekhez mérsékelt mintakoncentráció mellett.
2 mm-es út
Növeli az érzékenységet a közeli UV-CD esetén, miközben lehetővé teszi a távoli UV-sugárzást. 200-400 µL térfogata.
5 mm-es út
A legjobb a 250 nm feletti aromás maradékok és kofaktorok közel UV-CD-jéhez. 500-1000 µL térfogata.
10 mm-es út
Szabványos úthossz UV-Vis és közel UV-CD esetén; általában túlságosan elnyelő a távoli UV-sugárzáshoz 200 nm alatt vizes pufferrel. 1-2 ml térfogatú.
Az úthosszon túl vegye figyelembe a teljes optikai utat. Az ablakfelületeket alacsony karcolás-ásás-specifikációra kell csiszolni, és a küvettának mentesnek kell lennie a kettős töréstől; egy egyszerű teszt a keresztezett polarizátorok között túlzott feszültséget mutat ki. A fekete falú vagy maszkolt ablakú küvetták hasznosak fluoreszcencia vizsgálatokhoz, de nem szükségesek a szabványos CD-k esetében. A fémmentes felépítés előnyt jelent, ha a küvettát olyan ütközőkkel használják, amelyek megtámadják a fémvázakat.
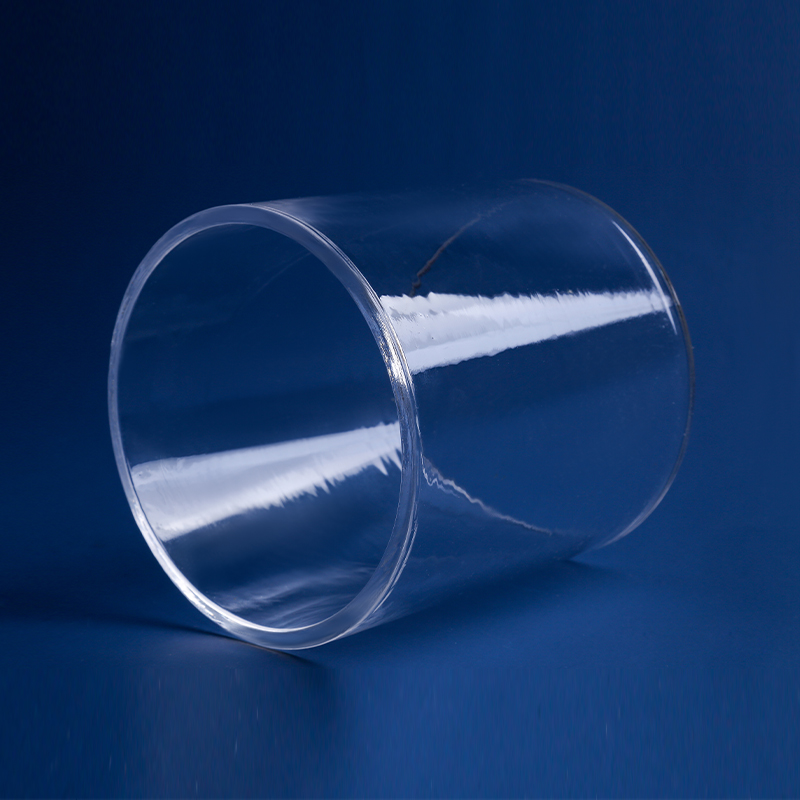
 Átlátszó kvarcüveg küvetta optikai műszerekhez Az UV-Vis és fluoreszcens spektrofotométerekhez tervezett kvarc küvetta a legtöbb vegyszernek ellenáll, és elviseli a magas üzemi hőmérsékletet. Optikai tisztasága és tartóssága praktikussá teszi a kezelést és a hosszú távú tárolást. Termék megtekintése →
 Legfontosabb következtetés: a helyesen megadott küvetta a legolcsóbb frissítés a CD-laboratóriumban: lerövidíti a tisztítási időt, stabilizálja az alapvonalat, és évekkel meghosszabbítja a cella hasznos élettartamát.
Tárolás, kezelés és rutin karbantartás a küvetták hosszú élettartama érdekében
A küvetta tárolásának és kezelésének módja a mérések között meghatározza, hogy milyen gyakran kell tisztítani. Az olvasztott szilícium-dioxid ablakok felszívják a fóliákat a levegőben szálló porról, az ujjlenyomatokról és még az ugyanabban a szekrényben tárolt szerves oldószerek gőzeiről is. A következő szokások a küvettát évekig optikai állapotban tartják.
Kezelési szabályok: a küvettákat csak a fagyos oldalfalaknál vagy a felső pereménél fogja meg, viseljen púdermentes nitril kesztyűt, és cella áthelyezésekor használjon PTFE végű csipeszt. Soha ne érintse meg a polírozott optikai felületeket. A tároláshoz és szállításhoz használjon erre a célra szolgáló, puha bélésű küvettadobozt, és tartsa a sejteket függőlegesen vagy fektetve tiszta, szöszmentes felületre. Az üveg-üveg érintkezés, amely akkor következik be, amikor a küvettákat egy fiókban halmozzák fel, gyakori forrása az élforgácsoknak.
Tárolási szabályok: a küvettákat üresen és szárazon, eltávolított kupakkal vagy dugóval kell tárolni, vagy lazán elhelyezve, hogy a nedvesség ne csapódjon le benne. Ne tárolja a küvettákat oldószerbe, metanolba vagy vízbe merítve; Az oldószerrel való hosszú érintkezés meglágyíthatja a megszilárdult sejteket, az álló víz pedig ösztönzi az algák vagy baktériumfilmek kialakulását. A tárolt küvettát több mint egy hét használaton kívüli használat után tisztítsa meg újra, mert még a pormentes tárolás is lehetővé teszi, hogy vékony szerves filmréteg halmozódjon fel az olvasztott szilícium-dioxidon.
Karbantartási ütemterv: hetente ellenőrizze az összes CD-küvettát látható filmek és karcolások szempontjából; alaposan tisztítsa meg őket havi váltással, vagy korábban, ha az alapszintű ellenőrzések már nem tisztaak; két egymást követő sikertelen ellenőrzés után cserélje ki a küvettát. Ha a laboratórium minden nap CD-t futtat, pufferrendszerenként legalább két összeillő küvettát tartson, hogy az egyiket meg lehessen tisztítani, miközben a másik használatban van. Néhány havonta egy tiszta, üres küvettán végzett gyors UV-Vis transzmissziós szkennelés dokumentálja, hogy az ablak lassan öregszik-e.
Legfontosabb következtetés: kezelje a küvettákat precíziós optikai komponensként, tárolja őket törékeny műszerekként, és végezzen mélytisztítást rögzített ütemezés szerint, ahelyett, hogy megvárná a szennyezett alapvonal megjelenését.
Kvarcküvetták beszerzése megbízható gyártótól vagy beszállítótól
A laboratóriumok, a forgalmazók és az OEM vásárlók számára a küvetta hosszú távú költségét a konzisztenciája és a tisztíthatósága határozza meg, nem pedig a kezdeti ára. A kvarcgyártó küvettái ellenőrzött optikai minőségű alapanyaggal és dokumentált feldolgozással évekig reprodukálhatóan tisztítanak; egy olcsó, bizonytalan minőségű cella finom alapvonali eltéréseket produkál, amelyeket nehéz nyomon követni. Éppen ezért a beszerzést a minőségbiztosítási rendszer részeként kell kezelni.
Ha árajánlatot kér egy kvarcküvetta gyártótól vagy beszállítótól, kérjen konkrét dokumentációt. Az anyagminőséget JGS1, JGS2 vagy ezzel egyenértékű nemzetközi jelöléssel kell megadni. A szállítónak meg kell adnia a 190–260 nm tartományban mért átviteli görbét, plusz-mínusz 0,01 mm-es vagy jobb úthossz-tűrést, és igazolnia kell, hogy az ablakok feszültségmentesek. A CD-munkáknál a nyúlásmentes tanúsítás fontosabb, mint az UV-Vis esetében, mert a kettős törés közvetlen optikai műterméket hoz létre. Kérje a cella tisztítási kompatibilitását is: teljesen összeolvadt-e vagy cementezett-e, és lehet-e ultrahanggal kezelni.
A mennyiségben vásárló nagykereskedők és forgalmazók számára a csomagolás és a nyomon követhetőség ugyanolyan fontos, mint az optika. A sejteknek egyedi védőtokokban kell érkezniük, a tételszámmal a címkén. A tételek közötti konzisztencia kritikus; az egyes tételekre vonatkozó tanúsítvány megakadályozza azt a helyzetet, amikor az egyik küvetta másként viselkedik, mint a másik. Érdemes megkérdezni, hogy a gyártó kínál-e egyedi méreteket, leszerelhető kiviteleket, egyedi ablakokat nagy minimális rendelési mennyiség nélkül. A Yancheng Mingyang Quartz Products Co., Ltd. egy kvarctermékeket gyártó Yanchengben, Kínában, és a Jinzhou Mingde Quartz Glass Co., Ltd. gyártóüzemeként szolgál; a vállalat kvarcküvettákat, laboratóriumi kvarceszközöket, optikai kvarclemezeket és egyedi kvarc alkatrészeket gyárt laboratóriumi és ipari ügyfelek számára világszerte. A közvetlen gyártói kapcsolat a vevő számára biztosítja a minőség, a tanúsítás és az egyedi gyártás feletti ellenőrzést.
Legfontosabb következtetés: vásároljon küvettát CD-hez tanúsítvánnyal, ne csak katalógusszámmal; a minőség és a feszültségmentes visszaigazolás kevésbe kerül a vásárláskor, de nagy mennyiségű hibaelhárítást takarít meg a későbbiekben.
Gyakran ismételt kérdések a CD-spektroszkópiához használt kvarcküvetták tisztításáról
Van-e legjobb módszer a kvarcküvetták tisztítására CD-spektroszkópiához?A legmegbízhatóbb módszer a standard sorrend: ürítse ki a mintát, öblítse le pufferrel, öblítse le ultratiszta vízzel, mossa le 1-2 százalékos semleges kvarckompatibilis mosószerrel, öblítse újra vízzel, öblítse metanollal vagy etanollal, és szárítsa meg nitrogénnel. A fontos szempont az, hogy a mintát soha ne hagyjuk megszáradni a cellában, és az eredményt 220 nm-es víz alapvonallal ellenőrizzük. |
Használhatok ultrahangos fürdőt a CD kvarc küvetták tisztítására?Csak akkor, ha a küvetta teljesen összeolvadt egy darabból áll. A cementezett vagy kétrészes küvetták ultrahangos rezgés hatására szétválhatnak vagy szivároghatnak. Ellenőrizze a gyártó dokumentációját; kétség esetén használjon kézi áztatást. |
Hogyan távolíthatom el a fehérjeréteget, amely nem válik le mosószerrel?Használjon enzimatikus emésztést, például pepszint 1-2 mg/ml koncentrációban 0,1 M sósavban 37 Celsius-fokon 1-2 órán át. Ezt követően alaposan öblítse le. Kerülje a forró nátrium-hidroxidot, amely bemarja a kvarc ablakot. |
Az ujjlenyomat valóban befolyásolja a CD mérését?Igen, és drámaian. Az ujjlenyomat-maradékok aminosavakat és zsírsavakat tartalmaznak, amelyek 250 nm alatt abszorbeálnak; egyetlen véletlen érintés 0,05-0,1 AU-val növelheti 220 nm-en, és tönkreteheti az alapvonal síkságát. A küvettákat mindig a fagyos falaknál fogja meg, miközben púdermentes kesztyűt visel. |
Milyen gyakran kell tisztítani a kvarc küvettákat CD-spektroszkópiához?Minden használat után, különösen, ha a minta fehérjéket, lipideket vagy sókat tartalmaz. A mérés után azonnal ürítse ki és öblítse ki a küvettát. A több mint egy hétig használaton kívüli küvettákat a következő mérési sorozat előtt újra meg kell tisztítani. |
Mikor kell a kvarc küvettát tisztítás helyett cserélni?Cserélje ki a küvettát, ha két egymást követő mélytisztító ciklus nem állítja vissza az alapvonalat, ha látható karc keresztezi az optikai felületet, ha a cella szivárog, vagy ha a felületi dér maratást jelez. A megfelelően kezelt olvasztott szilícium-dioxid küvetta évekig kitart; a korai meghibásodások szokásos okai a hidrogén-fluorid, a forró tömény lúg és a mechanikai kopás. |
Legfontosabb következtetés: a legjobb tisztítási stratégia a megelőzés: azonnal öblítse le, ellenőrizze minden nap, és csak akkor cserélje ki, ha a tisztítás nem tudja helyreállítani az optikai felületet.
Kapcsolódó források és termékinformációk
A küvetták specifikációiról, szabványos geometriájáról és a gyártási választékból elérhető kvarcminőségekről lásd a kvarc küvetták spektroszkópiához oldalon.
Ha az Ön CD-alkalmazásának nem szabványos úthosszra, leszerelhető kialakításra vagy speciális olvasztott szilícium-dioxid-minőségre van szüksége, a egyedi kvarc gyártás szolgáltatás támogatja az egyszeri és kötegelt gyártást.
Kvarctermékek gyártója és szállítójaként a Yancheng Mingyang Quartz Products Co., Ltd. kvarcküvettákat, laboratóriumi kvarceszközöket, optikai kvarclemezeket és kapcsolódó alkatrészeket gyárt CD-spektroszkópiához, UV-Vis-analízishez és más optikai alkalmazásokhoz. A cég a Jinzhou Mingde Quartz Glass Co., Ltd. gyártóüzemeként működik, laboratóriumi, ipari és nagykereskedelmi ügyfeleket szolgálva ki a globális piacokon.
Kiemelt termékek
Szerzői jog © Yancheng Mingyang Quartz Products Co., Ltd. Minden jog fenntartva.
Nagykereskedelmi kvarctermékek gyártója Kvarcüveggyár